Writing a USB Image on Chrome OS
Outside of work, I use Chrome OS for almost everything (actually, even for work sometimes, thanks to Amazon WorkSpaces). But I still sometimes need to Linux something. There aren't a lot of good answers out there on how to write a bootable ISO image to a USB stick / thumb drive on Chrome OS, so here's mine.
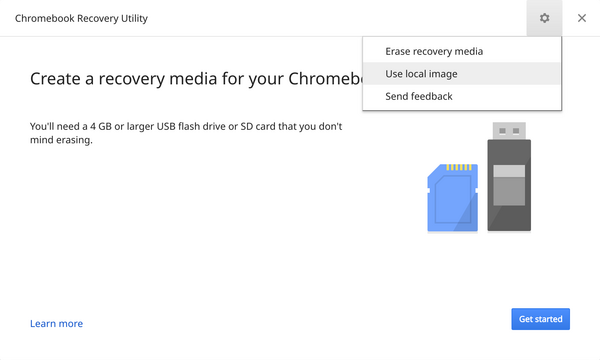
Google provides a utility to create Chromebook recovery media. This handy tool you'll likely never use will help you find the right recovery image for your Chromebook, or just about any other, and burn it to a USB drive. But it also has a "Use local image" option. This feature is looking for a file with a .bin extension, but it doesn't inspect the file to be sure it's a Chrome OS recovery image. It will write the image to your USB drive and verify that the write was successful.
- Rename your
.isofile to.bin- If the image file is in a
.zipfile, it may have to be extracted / copied to Download, at least that's what the folks at Neverware suggest, but I've had success with a.zipfile with a single.binfile in it
- If the image file is in a
- Open the Recovery app and click on the ⚙️ icon
- Select "Use local image"
- Browse to your renamed
.binfile and click "OPEN" - Select your USB drive and click "Continue"
- If everything looks right, click "Create now" and ponder the benefits of patience
This method is inferior to what you can do with Rufus on Windows, or other tools on just about any OS. The better tools can setup your device to let you boot your Linux live image but still be able to store other data on the device, or in some cases create a persistence file so that you can use it as a portable OS and keep your settings and data.